
Bringing Sonic Forces & Dash Skins to Sonic Dream Team"
The porting pipeline for bringing character skins from Sonic Forces and Sonic Dash to Sonic Dream Team.
At HARDlight, our art team constantly produces new character skins for Sonic Forces and Sonic Dash, handling everything from initial concepts to creation and implementation. With so many great-looking designs and so much time put into them, a question naturally arose: could we bring these skins to Sonic Dream Team?
There were three key constraints to consider:
- Animation compatibility: Each character needed to use its existing animation set. We couldn’t tweak or create animations, so the skinning had to match perfectly and the underlying skeleton had to remain unchanged.
- Model quality: The Sonic Forces and Sonic Dash characters each has two model variants: a high-poly promotional render and a low-poly in-game model. The promotional model was far too detailed to use in-game as-is, while the game model was too low-poly and low-resolution for Sonic Dream Team. The assets for Sonic Forces and Sonic Dash are heavily optimised to support an extremely broad range of devices. Sonic Dream Team, however, is an Apple Arcade exclusive, and even its lower-end target hardware is often more powerful than devices running those games.
- Production time: Each skin needed to be quick to create and port.
After some investigation, I confirmed that it was possible. I defined the full pipeline and handled the initial porting work before handing off some of the model preparation to another artist.
It was a significant task. I hadn’t been involved in the animation pipeline during the game’s original development, so there was a lot to unpack and understand just from the rigging and animation side alone.

Thankfully, Superspline, the studio contracted for animation and rigging, had created videos explaining their rough workflow. After working through the documentation, I refreshed my Maya skills, learned more about rigging, and created Warrior Shadow as the first skin to fully validate the workflow.
The Porting Pipeline
The final pipeline worked as follows:
1. Mesh Optimisation
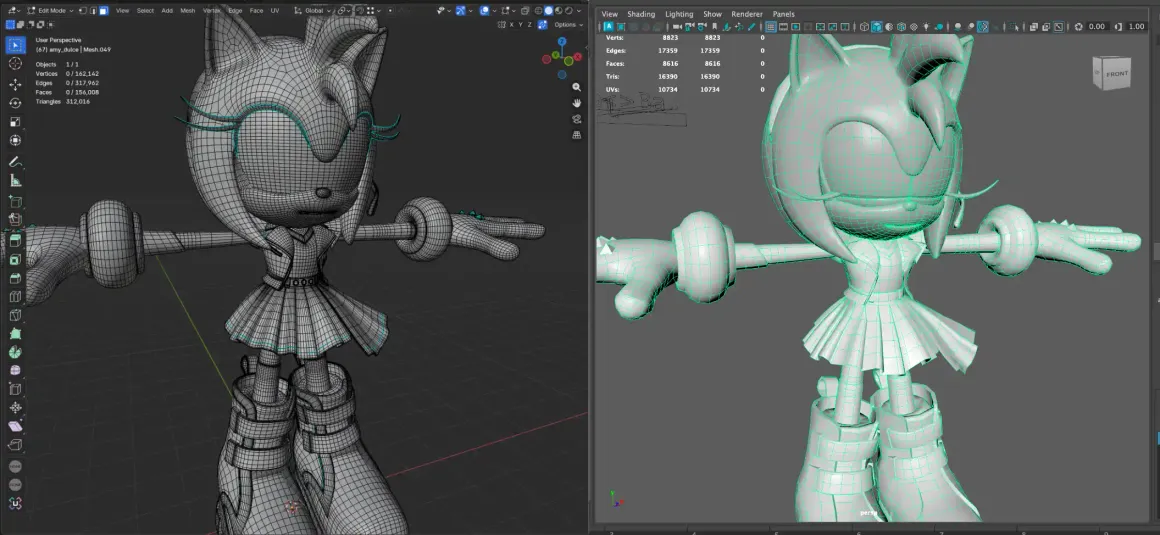
Reduce the high-resolution promotional model to a triangle count suitable for use in-game. In the image below, the left shows the original mesh in Blender, and the right the reduced mesh in Maya. Sometimes it would be a case of removing sub-div modifiers, however this could sometimes collapse the geometry too much, so manual removal/clean-up was often needed. A saving grace here was that Sonic Dream Team doesn’t use LODs for its hero characters, as they are always seen close to the camera. This meant not having to worry about UV changes too much or replicating the clean-up multiple times… few.
2. Material Consolidation
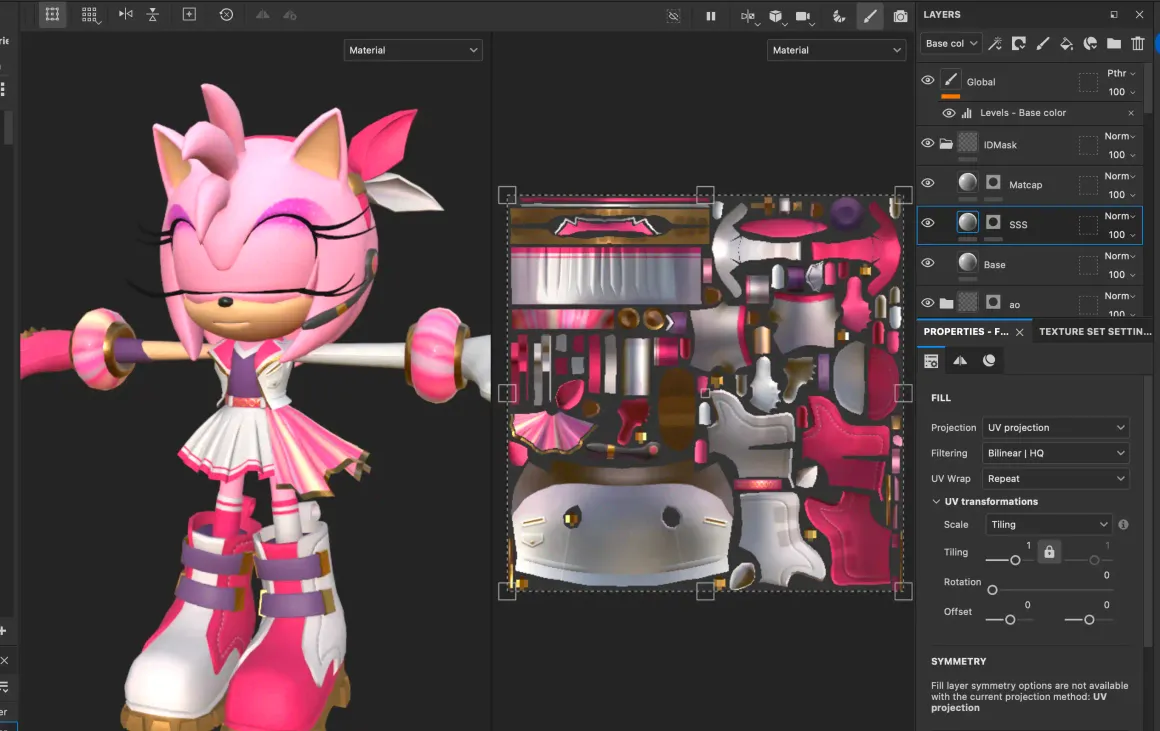
The original models often used multiple materials to achieve the best possible visuals. For the game-ready versions, these needed to be consolidated into just one or two materials.
This meant recreating the textures in Substance Painter, using the original source files as references. The simplest approach was to open two instances of Substance Painter, create Smart Materials from the source asset to reproduce its surface finishes one-to-one, and then bring those materials into the new file.
Why not duplicate and edit the original source file? I wondered the same thing. After testing both approaches, however, I found that recreating the file was quicker and easier than untangling an older project.
3. Rig Integration
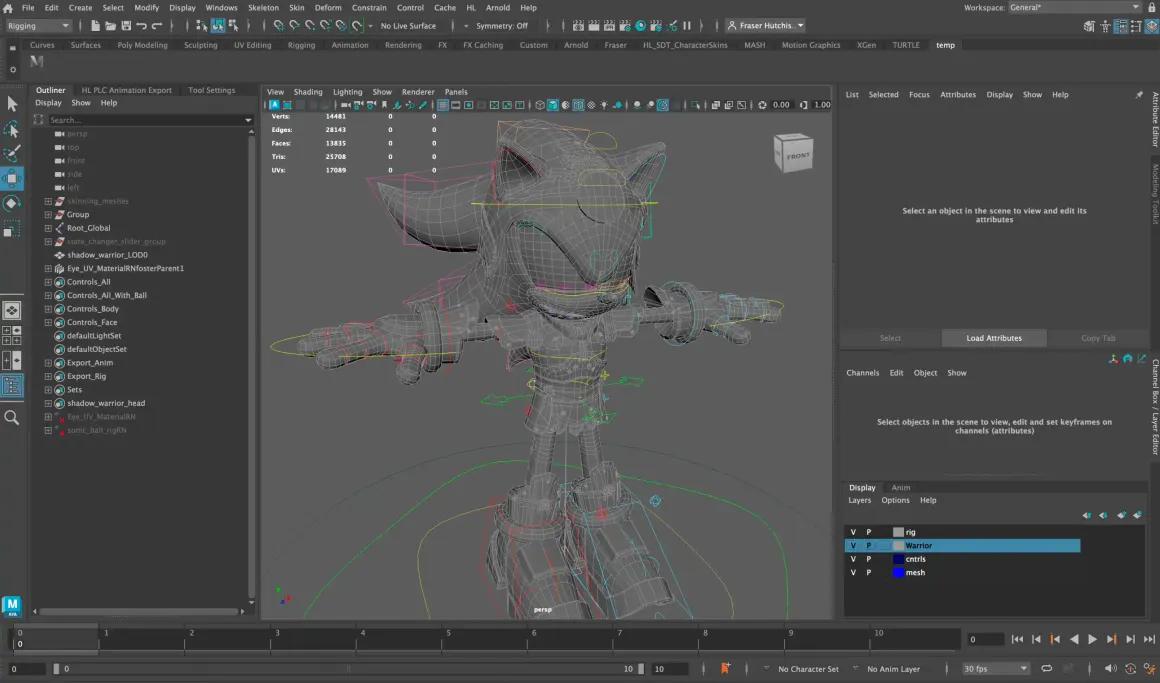
Duplicate the corresponding Sonic Dream Team character rig in Maya, then import the new mesh.
4. Rig Preparation
Ensure any driven keys were at their defaults such as closing the character’s eyes and reveal the eyelashes. This was crucial for an accurate skin-weight transfer; without it, the transferred weights were incorrect.
5. Rig Transfer
Transfer the rig and skin weights to the new model. I partially automated this with a script based primarily on Maya’s existing skin-weight transfer tools, with a few modifications. There’s more on that further down.
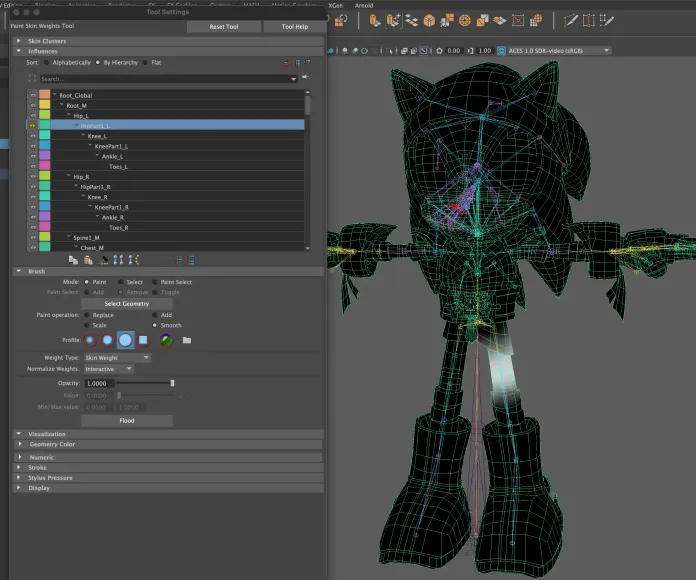
6. Weight Clean-up
Manually correct any problematic deformation using skin-weight painting. Because the source and target meshes weren’t perfect one-to-one matches, several areas required clean-up. There was nothing fancy involved here—just good old-fashioned skinning.
7. Unity Setup
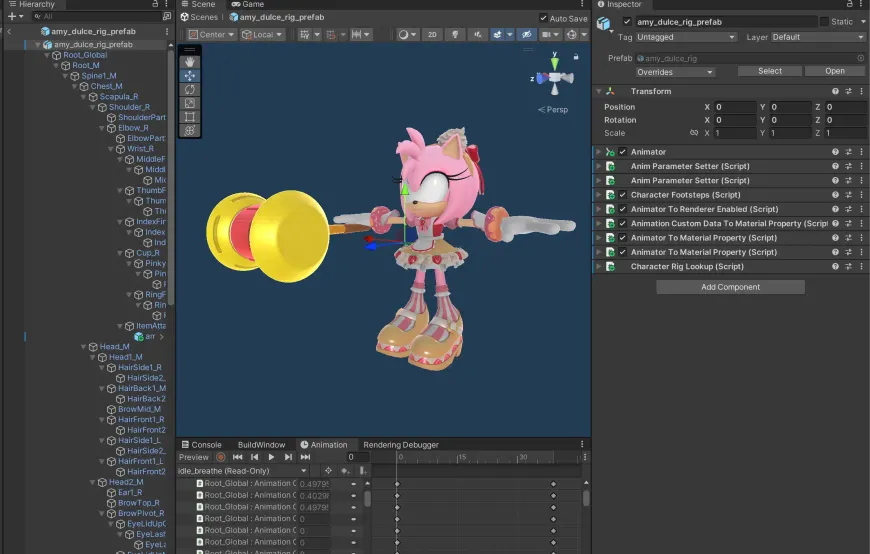
Export the character from Maya using Game Exporter, import it into Unity, and configure the prefabs and gameplay components to match the existing characters.
8. Animation Testing

Test the animations in-game, checking for mesh clipping and deformation issues.
9. UI Asset Creation
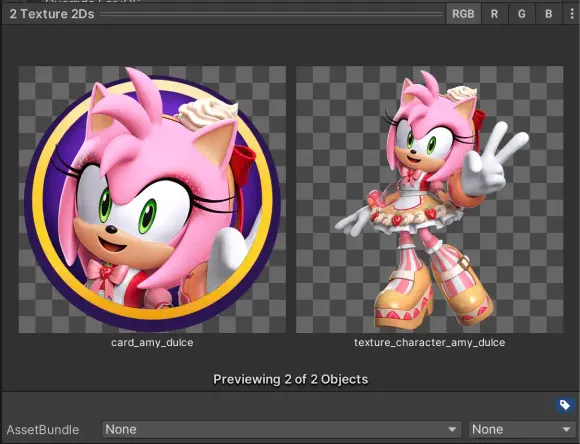
Pose the rigged model and create all required UI assets. Our artists completed this step using the original source files in 3ds Max or Blender, depending on which digital content creation tool the character had originally been built in.
10. Approval
Create turnaround sheets and submit them to SEGA Japan for approval. Because these character designs had already been approved, the turnaround was quick and required only minor visual tweaks.
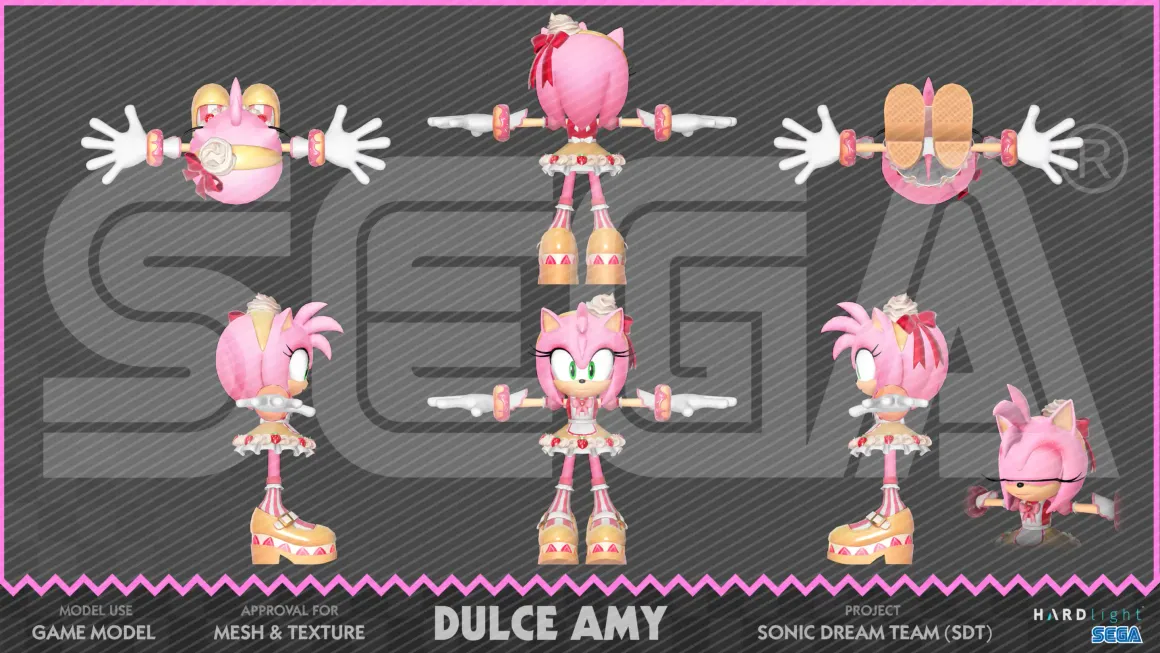
Although the process may sound lengthy, I could complete a skin in around four days end to end - far quicker than our initial estimate of two to three weeks. Some characters took only two days because they had simpler meshes and textures, or aligned more closely with the existing Sonic Dream Team character silhouette which helped with the weight transfer.
The workload was shared between me and another artist. They focused on posed renders and assisted with modelling and texturing, while I handled the rigging, Unity integration, and additional model and texture work.
In total, we ported 11 skins. It was rewarding to see the characters looking nearly identical to their high-resolution renders while being fully playable in-game.
More of the process could undoubtedly be automated, especially if additional skins were planned from the beginning of production. Given the relatively straightforward and fast turnaround, however, a mostly manual workflow with targeted automation got the job done.
Skinning
Skinning was the most complex part of the process, mainly because every rig needed to function identically to their original. Some characters also had unique quirks. For example, the female characters had hidden eyelashes controlled by driven keys. If these weren’t reset to their default shown states, the skin transfer would get completely borked.

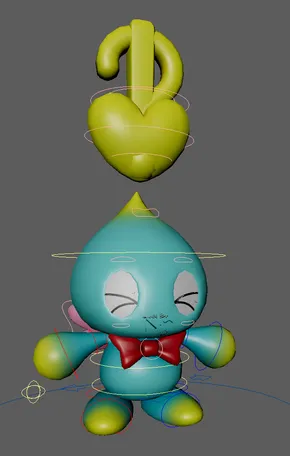
While Cheese the Chao used custom meshes for emotes and multiple facial expressions that would be dynamically turned on and off through custom animation attributes.
To streamline the workflow, I created several quick and dirty Maya Python tools using PyMel. These automated tasks such as transferring rigs, toggling eye states, and selecting driver bones.
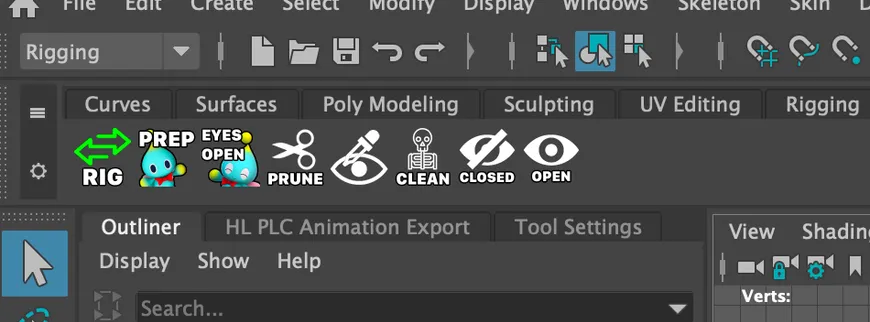
The Rig Transfer script for example ensured that any driven keys were first set to their defaults, then the weight transfer applied. Although this sounds like a simple thing, it was a great time saver when having to update the rigs after a mesh change, and forgetting the required steps many times before having the script…
import maya.cmds as cmds

def selectKeyframeWithTolerance(attribute, target_time, tolerance=0.001):
    # Get all keyframe times for the attribute
    key_times = cmds.keyframe(attribute, query=True, timeChange=True)

    if key_times:
        for key_time in key_times:
            # Check if the key time is close to the target time within the tolerance
            if abs(key_time - target_time) < tolerance:
                # Select the keyframe at this time
                cmds.selectKey(attribute, add=True, keyframe=True, time=(key_time, key_time))
                print(f"Selected keyframe at time {key_time}")

def startEyeLashes():
    selectKeyframeWithTolerance('FKEyelashScaler_M_scaleX', target_time=0.35)
    selectKeyframeWithTolerance('FKEyelashScaler_M_scaleY', target_time=0.35)
    selectKeyframeWithTolerance('FKEyelashScaler_M_scaleZ', target_time=0.35)

    cmds.keyframe(edit=True, valueChange=1)

    cmds.select('Eyes:eye_r_cntrl', replace=True)
    cmds.setAttr('Eyes:eye_r_cntrl.lid_top', 0)
    cmds.setAttr('Eyes:eye_r_cntrl.lid_btm', 0)

    cmds.select('Eyes:eye_l_cntrl', replace=True)
    cmds.setAttr('Eyes:eye_l_cntrl.lid_top', 0)
    cmds.setAttr('Eyes:eye_l_cntrl.lid_btm', 0)

def copySkin():
    objects = cmds.ls(sl=True)
    findSkinCluster = cmds.listHistory(objects[0], pdo=1, il=2)
    oldSkincluster = cmds.ls(findSkinCluster, typ='skinCluster')

    for e in objects:
        if e == objects[0]:
            continue
        shapeHistory = cmds.listHistory(e, lv=2)
        oldSkc = cmds.ls(shapeHistory, typ='skinCluster')
        if oldSkc:
            cmds.delete(oldSkc)
            print('Deleted existing skinCluster on ' + e)
        jnt = cmds.skinCluster(oldSkincluster, weightedInfluence=True, q=True)
        cmds.select(jnt)
        newSkc = cmds.skinCluster(jnt, e, tsb=True, mi=40, omi=True)[0]  # max influences
        cmds.copySkinWeights(ss=oldSkincluster[0], ds=newSkc, nm=True, surfaceAssociation='closestComponent', influenceAssociation='oneToOne')
        cmds.rename(newSkc, oldSkincluster[0])

#startEyeLashes()
copySkin()
Closing Notes
Working on these skins was a fantastic deep dive into the animation pipeline of Sonic Dream Team. I learned a great deal, not only about rigging in Maya, but also about how we could improve the process next time for making it easier to implement skins like these. It even inspired me to start learning rigging in Blender at home, an area I hadn’t previously explored in much depth.
In total 11 skins were ported and added to the game
- Drummer Cream
- Unicorn Cream
- Amy Popstar
- Rockstar Rouge
- Pirate Sonic
- Treasure Hunter Knuckles
- Tails Valiant
- Idol Shadow
- Warrior Shadow
- Valentines Rouge
- Dulce Amy